Showing posts with label bedroom. Show all posts

Monday, August 15, 2011

Ta-Da, they are done!

Whewwwwwwww! I feel like I just went down the hill on a rollercoaster!!!

Just over one week later, the stripes are done! This project didn't take me one solid week, but I gave myself plenty of time to do it because I just knew it would be extremely tedious. Actually, Wed-Sat this past week were gorgeous summer days here and I didn't pick up my paintbrush once. Ultimately, I worked Sun, Mon, Tues, Sun, Mon on it.

I was excited to get the room back in working order today after finishing the second coat on the last wall, so here is a pic I captured just a short while ago. The accessorizing is basic, nothing too overblown or with anything new. From the start, I intended to keep the existing white bedding and bubble shades (both from Target), but I switched out the curtain rods (to ones I already owned, but never put up in this house, so no cost there).

Again, a look at the before w/ the seller's blue walls:


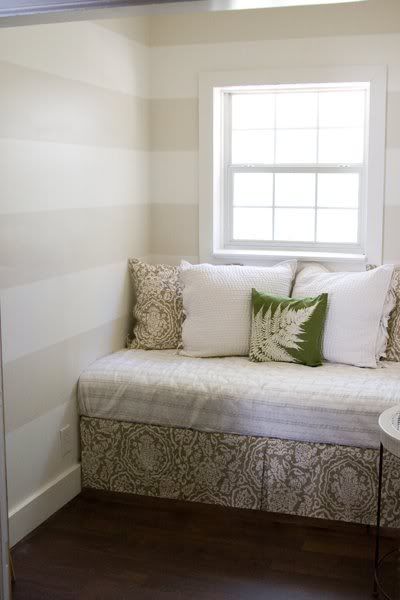
And, NOW!


Details:
Colors: Behr's Chocolate Froth (lighter color) & Wheat Bread (darker color)
Supply: Used about 2/3 of one gallon of Chocolate Froth (2 coats); Almost 2 full quarts of Wheat Bread (2 coats); 2.5 rolls of 1-inch Frog tape

Thoughts:
What did I learn from this project?

  • My ceiling isn't quite level. This was challenging for measuring the first set of stripes from the top of the wall. The eye wants to see them the same distance from the top of the ceiling the whole way around this room AND intersect window frames from the same point on each side--uh, tough to do.
  • Frog tape rocks to make clean tape lines. It's very tough, though, to maneuver in high humidity and loses its adhesiveness quickly if you mess with it a lot, causing it to buckle and peel a little. So, you've got to press the tape down tightly just before rolling the paint on.
  • Patience and taking breaks made this possible. My only goal was to finish it before I went back to school on August 23. Accomplished! This is not a weekend job--at least not for me!
  • I don't know if I would do this again.
  • I'd have to have a pretty darned good reason to EVER paint this room again!
  • I love the final product---a lot!!!
  • I really love Home Depot, but I strongly dislike Behr paint. For the base color, I used their new "Ultra" paint, which boasts about its built-in primer. This paint did not offer any higher quality coverage than paint I had used before. In fact, basic Benjamin Moore paint has better coverage than this paint. Then, when I painted the darker stripes, I used the regular Behr paint. It was very thin. Two coats were a must. I had a store credit for Home Depot and that is mainly why I used Behr paint. In the future, I'll definitely go back to Benjamin Moore and save my store credit for other things.

Tuesday, August 9, 2011

Progress!

Here's an update.....Well, after peeling the tape on the test wall, I deemed it a success!

I turned the corner...literally! I've just started taping on the other side of the window and I ran out a tape and am almost out of the "Wheat Bread" stripe color (I clearly underestimated my supply demands--I only bought one quart of the wheat bread and I probably had enough to do the first coat of the next wall, but not 2 coats on the rest of the walls.) PS, the lighting is bad because I used my iPhone for these pics and not my regular camera w/ a flash.


To the other side of the window! Using the lower stripe line to keep both sides of the window consistent. Fingers crossed!


Step by step.....day by day! I'll get there! I have 2 weeks until school starts back up and this room will be done!


Monday, August 8, 2011

This is what I've been up to...

....and I'm super exhausted already and it's not even close to being completed yet!

I have always been drawn to striped walls like these:


Now, all I needed was tape, paint, and patience. The kicker in never embarking on this process was the patience factor...

Last week, my inspiration was sparked by a friend's room that she just completed featuring gorgeous striped walls. She made it look so easy and gorgeous, I was set on biting the bullet and copying her look!

I decided the guest bedroom was the place to try this experiment. Here is a recent photo of the guest bedroom with its original seller's blue walls:


Here is where I am at so far...I painted the walls "Chocolate Froth" by Behr (2 coats):

Then, I taped the wall (ONE wall so far) ....I marked the wall in 8 inch intervals 4x across the width of the wall. Then, tried to line of the tape so it was level. THIS was the most frustrating part of the project (as I expected it would be and ultimately, the reason why I've never tried this project before!) I marked with a random piece of tape the areas that would be painted so I would remember to put the tape either below or above the 8 inch mark points. The main problem is that your eye starts to play optical illusions with the tape lines and they start to move and....needless to say, I kept obsessing with my level and measuring tape (and a few curse words here and there!)


Then, I rolled the color "Wheat Bread" (the next color down on the Behr paint chip). The frog tape kept peeling up because it's humid out today, so I had to press it down firmly again just before rolling. I used a brush to do the sides around the edges. The first coat is drying as we speak and I will apply the second coat later tonight (as I have to leave soon to go to a meeting at work and then teach a spin class!).


Hopefully, tonight after I do the second coat & peel the tape, I will love it so much, the remaining walls will be taped and follow in suit....but, I can't make any guarantees! That is why I only did one wall right now. If I hate it and deem myself "unfit to tape stripes properly" I will just paint over the wall again in Chocolate Froth...

We shall see what the future brings!


Monday, June 21, 2010

Boudoir Updates!

So, I've grabbed a few things over time and have made some updates to my masterful master boudoir!!!

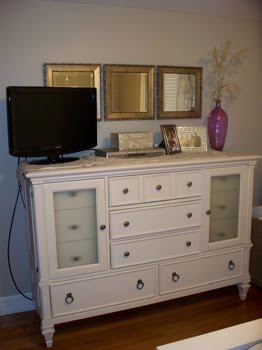
I bought these 3 square mirrors from Lowe's almost a year ago and wasn't quite sure what to do with them yet (Actually, I bought 4, I was thinking about doing a grid of 2 across, 2 down...). So, today, I decided to mimic the look of 3 side-by-side looks like the framed art I have on the opposing wall by putting 3 of the mirrors side-by-side. I was really torn about the placement of my tv. At first, I deliberated getting it mounted on the wall, but what if I ever wanted to change my room and put my bed on that wall (which will probably never happen, but....) Also, I sort of don't like the look of a mounted tv in the bedroom. So, while it's covering the first mirror right now, I'm okay with it--for now!!!

The mirrors were $24.99 each from Lowe's


Here is a closeup so you can see the fine detailing on the mirrors:


Then, at Homegoods, I grabbed a few cute storage boxes for that random stuff that accumulates in the bedroom!!! I love them because they are modern and clean looking, but also romantic and feminine, which is what I am going for with this room! (They were all $9.99--$14.99)


Lastly, I picked up this wire wall art dress form from Pier 1 for about $15.